HOMEMADE SOFT PRETZELS
It's Sunday again! Time to cook and do laundry and just relax.
Today is Homemade Soft Pretzels and Lasagna. I tried these pretzels for the first time back in September and was blown away how easy they were and how delicious! I usually stay away from anything using yeast because I don't work well with it. However, this recipe did not call for anything to be risen, so I gave it a shot.
Here is the link to the recipe:
She uses whole wheat flour, but I just used white. The first time I made these JJ and I ate 3 of them fresh and hot out of the oven. So yummy! My kids always loved soft pretzels and we would occasionally buy a box from the frozen food section of the grocery store and eat them with cheese sauce. These go really well with cheese sauce, too.
Ingredients:
1 and 1/2 cups lukewarm water
1 packet active yeast
1 tsp salt
1 tbsp sugar
3.75-4.25 cups all purpose flour
Coarse sea salt for sprinkling
I forgot to put the coarse sea salt in the picture. This is the first time I used it. Before all I had was kosher salt and that worked fine.
Preheat oven to 425 degrees. Line baking sheet with parchment paper or silicone baking sheet. I don't have either, so I used non-stick foil.
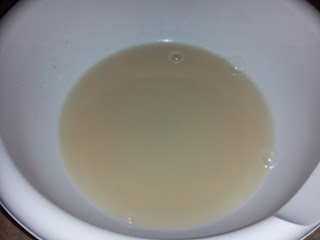
Dissolve yeast in warm water. Stir with a spoon until fairly mixed, about 1 minute. Some clusters of yeast will remain. Add salt and sugar; stir until fairly combined
Slowly add 3 cups of flour, 1 cup at a time.
Mix with wooden spoon until dough is thick.
Add 3/4 cup more flour until the dough is no longer sticky. If it is still sticky, add up to 1/2 cup more. Poke dough with your finger - if it bounces back, it is ready to be kneaded.
Turn the dough out onto a floured surface.
Knead the dough for about 3 minutes and shape into a ball.
With sharp knife, cut ball into 1/3 cup sections. No need to be exact - you can use as much or as little dough fore each pretzel as you wish. First time, it made 11-12 pretzels. One time, it made 13-14. This time, it made 10. I have gotten used to it and know about how big I want them and how many I want.
Roll the dough into a rope with an even diameter. I make the ropes about 20 inches long, as she said on the recipe. Again, this is up to you and how large/small you want the pretzels.
Once you have your long rope, take the ends and draw them together so the dough forms a circle. Twist the ends, then bring them towards you and press them down into a pretzel shape.
Steps 5 & 6 in her recipe are optional. I have tried them several different ways - not using step 5, but using step 6 and broiling in oven; using both steps 5 & 6 and broiling in oven. Turns out, I like them the way I originally made them - using step 5, but not step 6 and no broiling in the oven.
Boil 9 cups water with 2/3 cup of baking soda. Dunk the pretzels one by one into the mixture for 30 seconds. This creates that classic pretzel taste and texture to the outer layer and that is why I do it. I skip her step 6, which is beating and egg and dunking the pretzel into it.
Place dunked pretzels onto baking sheet and sprinkle with coarse sea salt.
Bake 15 minutes at 425 degrees. This is also a change from her recipe, as I don't do the 10 minutes of baking and 5 minutes of broiling. It makes them too crisp on top for me.
Allow to cool and enjoy. I removed them from the baking pan and put them on the counter so they did not continue to bake on the hot pans. A cooling rack would be even better, but I don't have one.
She states in the recipe that the pretzels may be stored in an airtight container or zip top bag for up to 3 days (they will lose softness). I always stored them in zipped bags and the next day they are kind of moist. They need to be heated up and they are okay, but tougher than when first baked. And they get moldy within just a few days.
I decided this time to go with freezing them. I plan to freeze them separately on the baking sheet, then put them into a freezer bag or container and keep them frozen. My thought is they can be quickly warmed up and might keep their freshness better that way. I'll report back if that worked well or not.
Next up, Lasagna!
UPDATE: Froze them individually on a baking sheet, then placed them in a freezer Ziploc once they were frozen. It's a week later, and after 45 seconds in the microwave, they are just like fresh! Would highly recommend this instead of storing in a Ziploc bag on the counter. They go bad within just few days that way.


Comments
Post a Comment